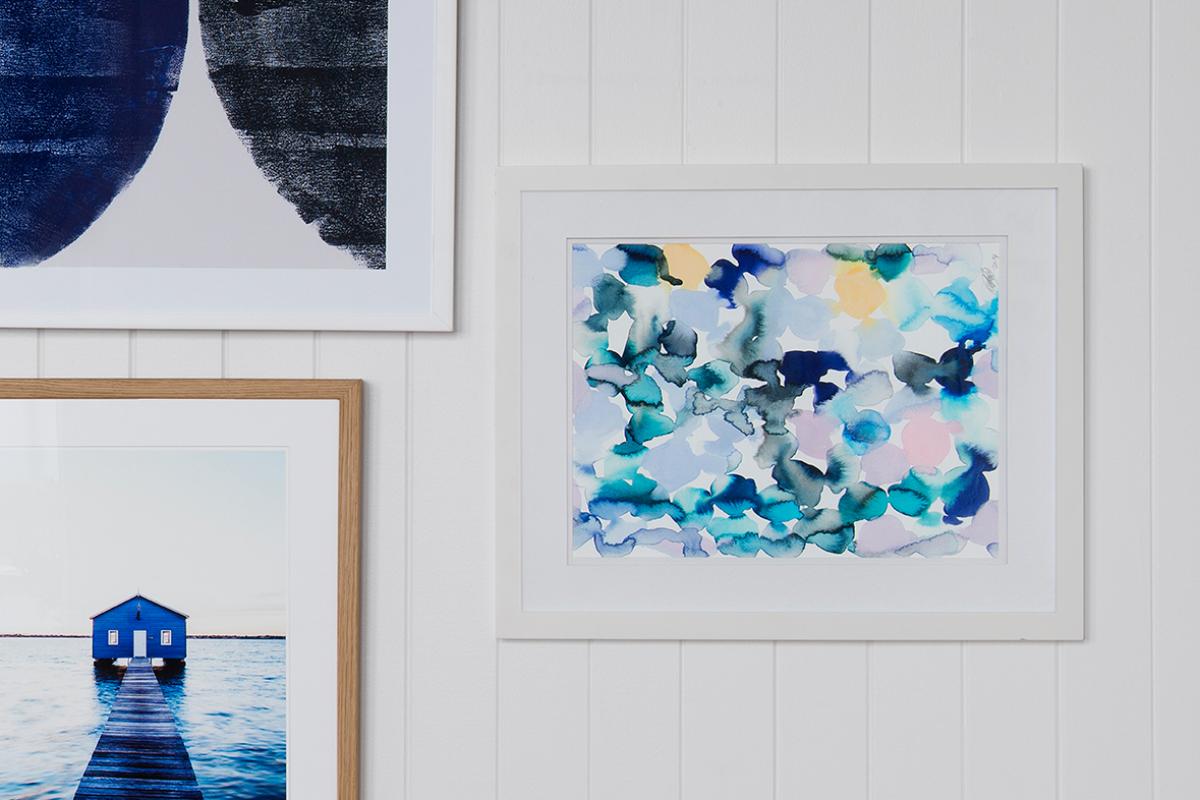
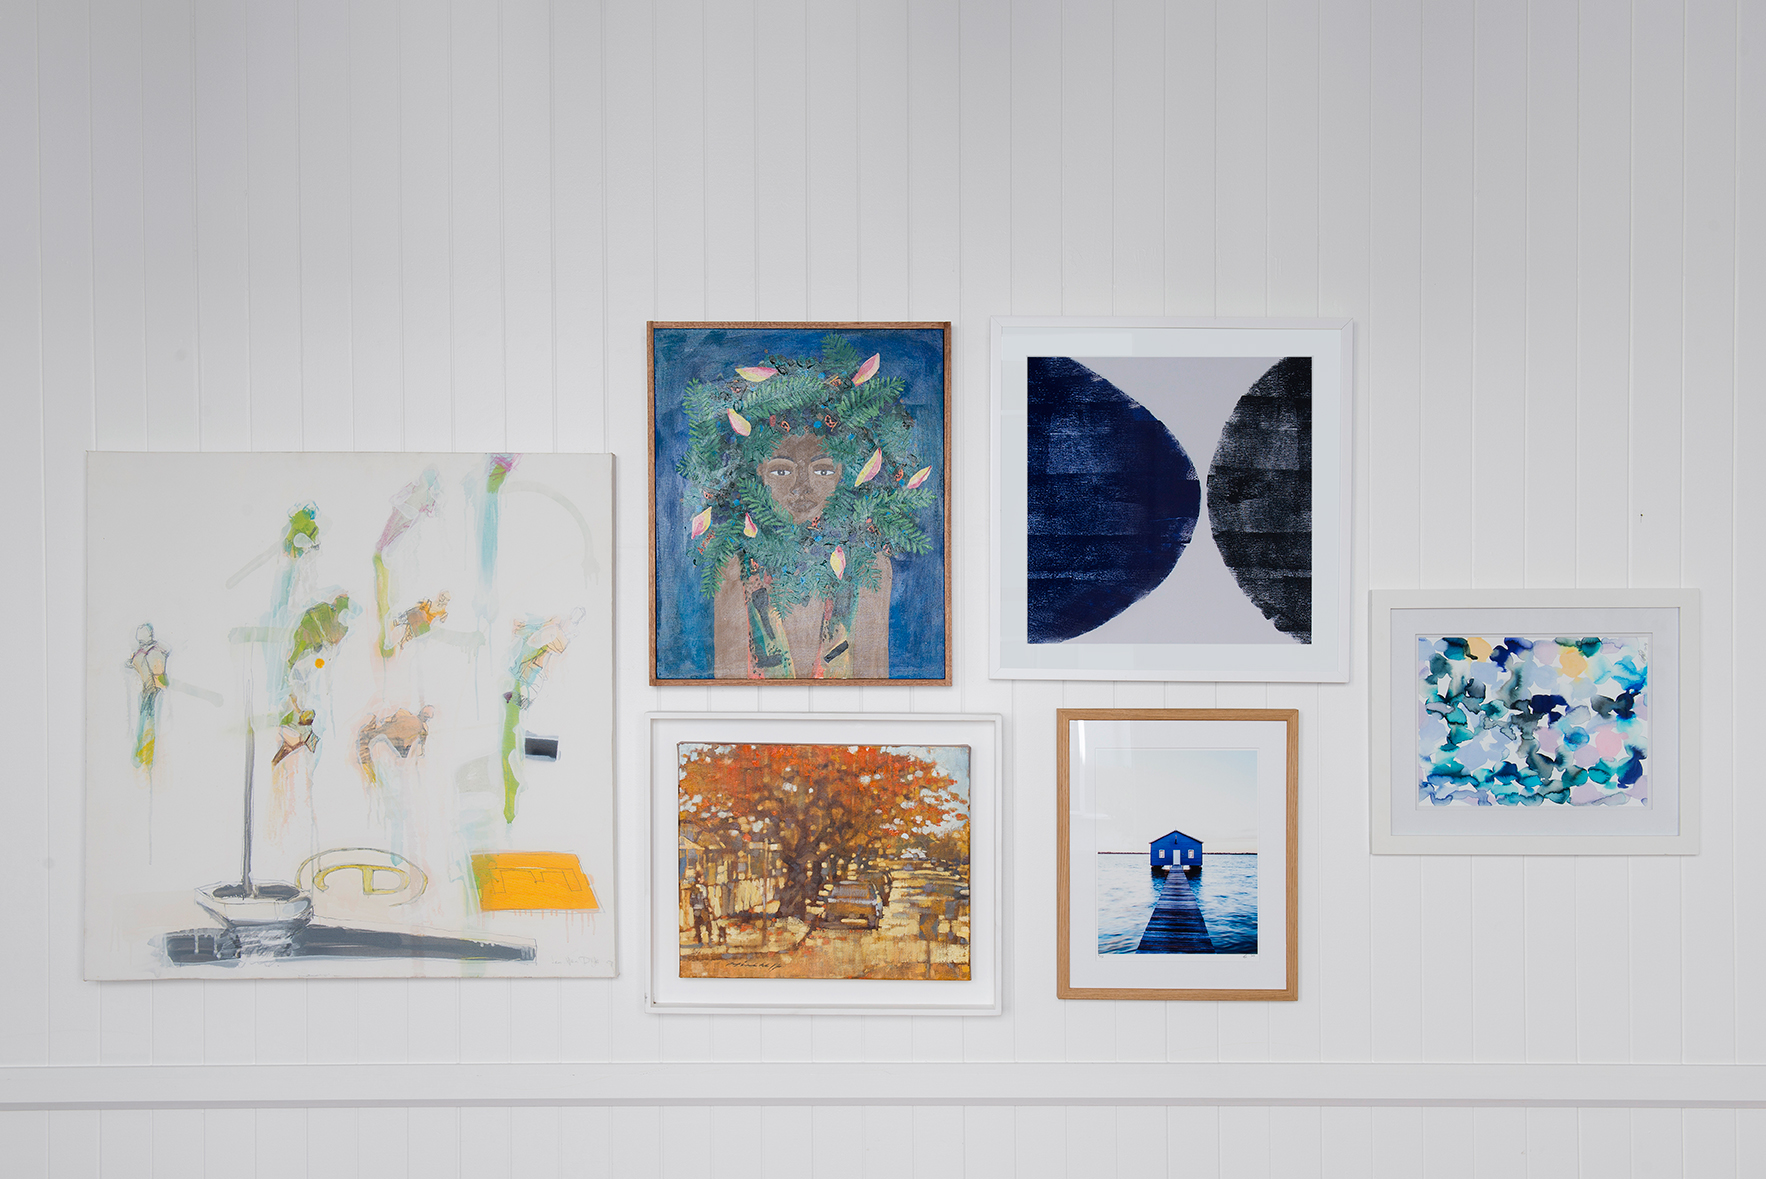
Creating a gallery wall is the ideal way to dress bare walls and add colour and personality to your home without having to commit to one large piece of art. When it comes to creating your own gallery wall, it helps to know there are very few right and wrongs. The number of pieces you use, the style, and the layout, is largely subjective to taste, so go with your instinct. With Lend Lease, we bring you our tips to help you get started.
- The ultimate layout
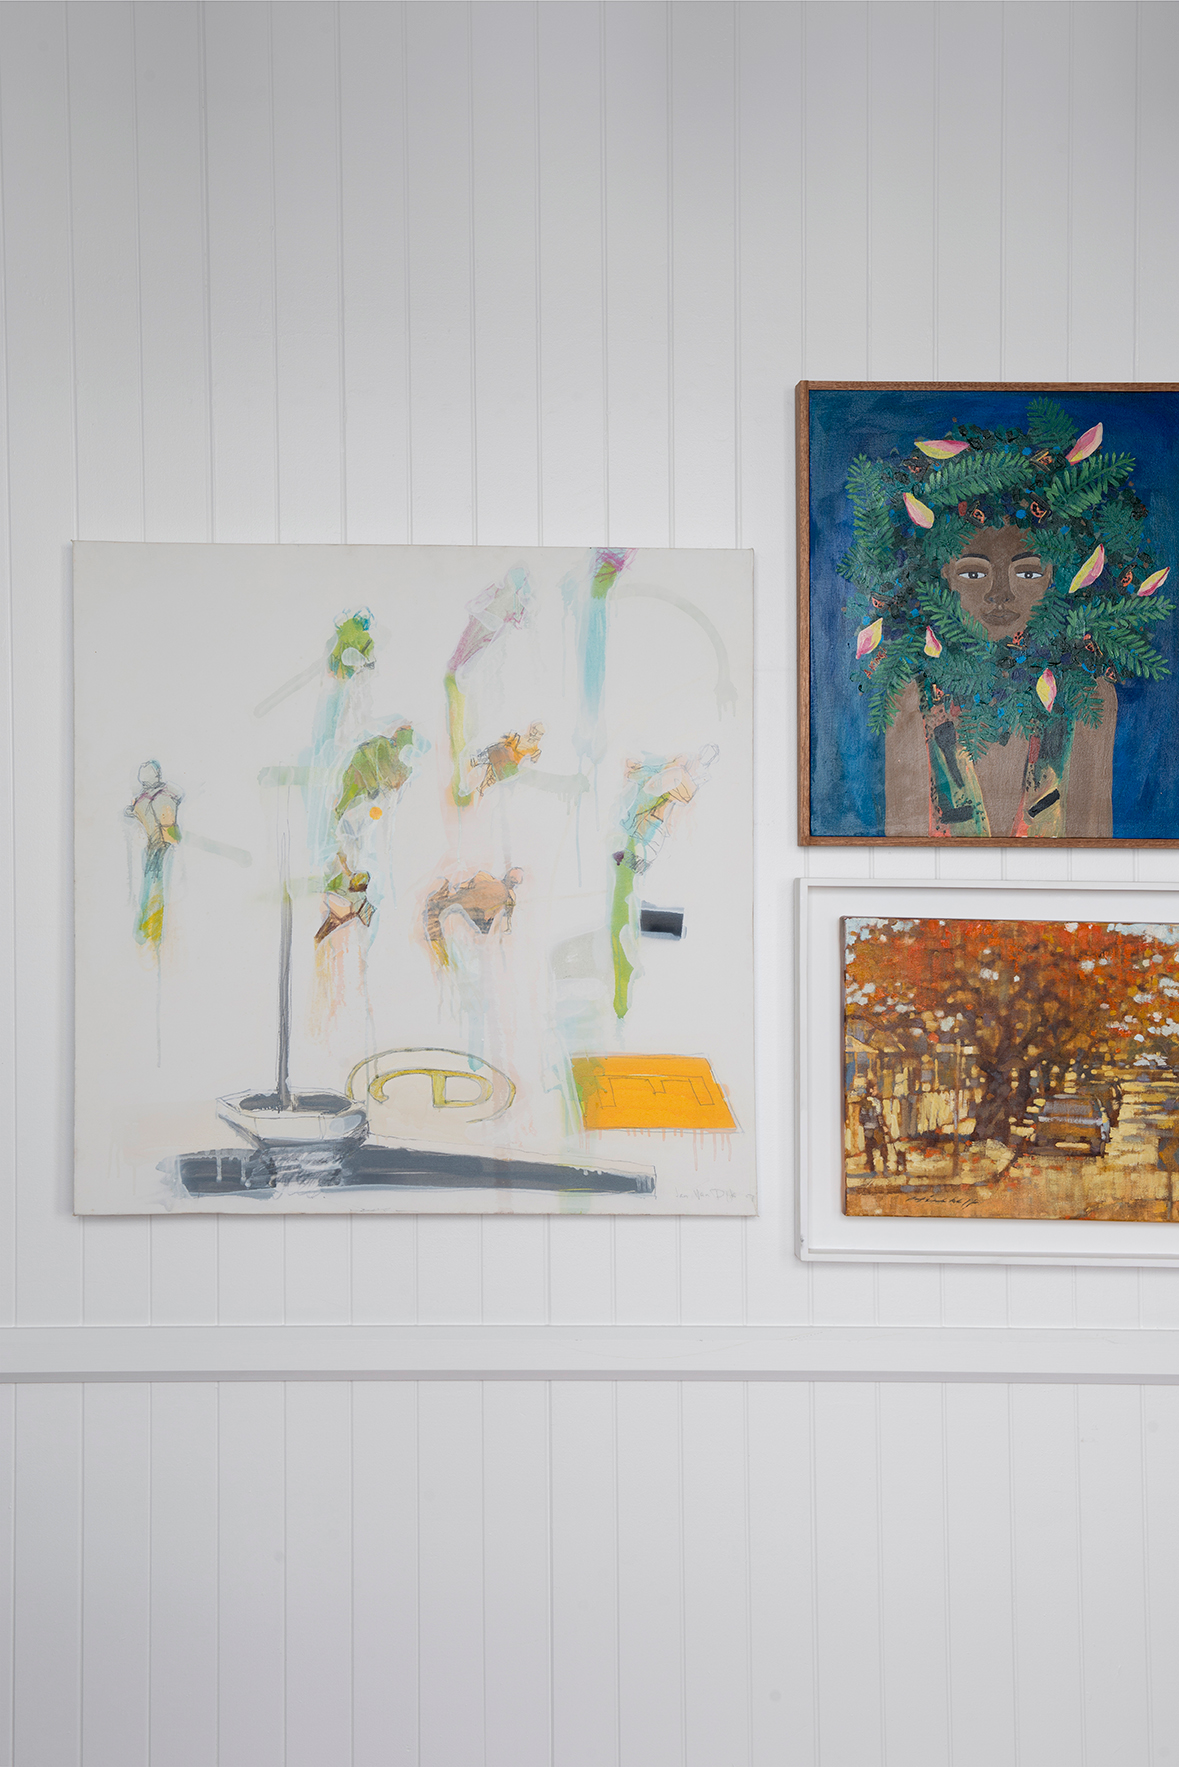
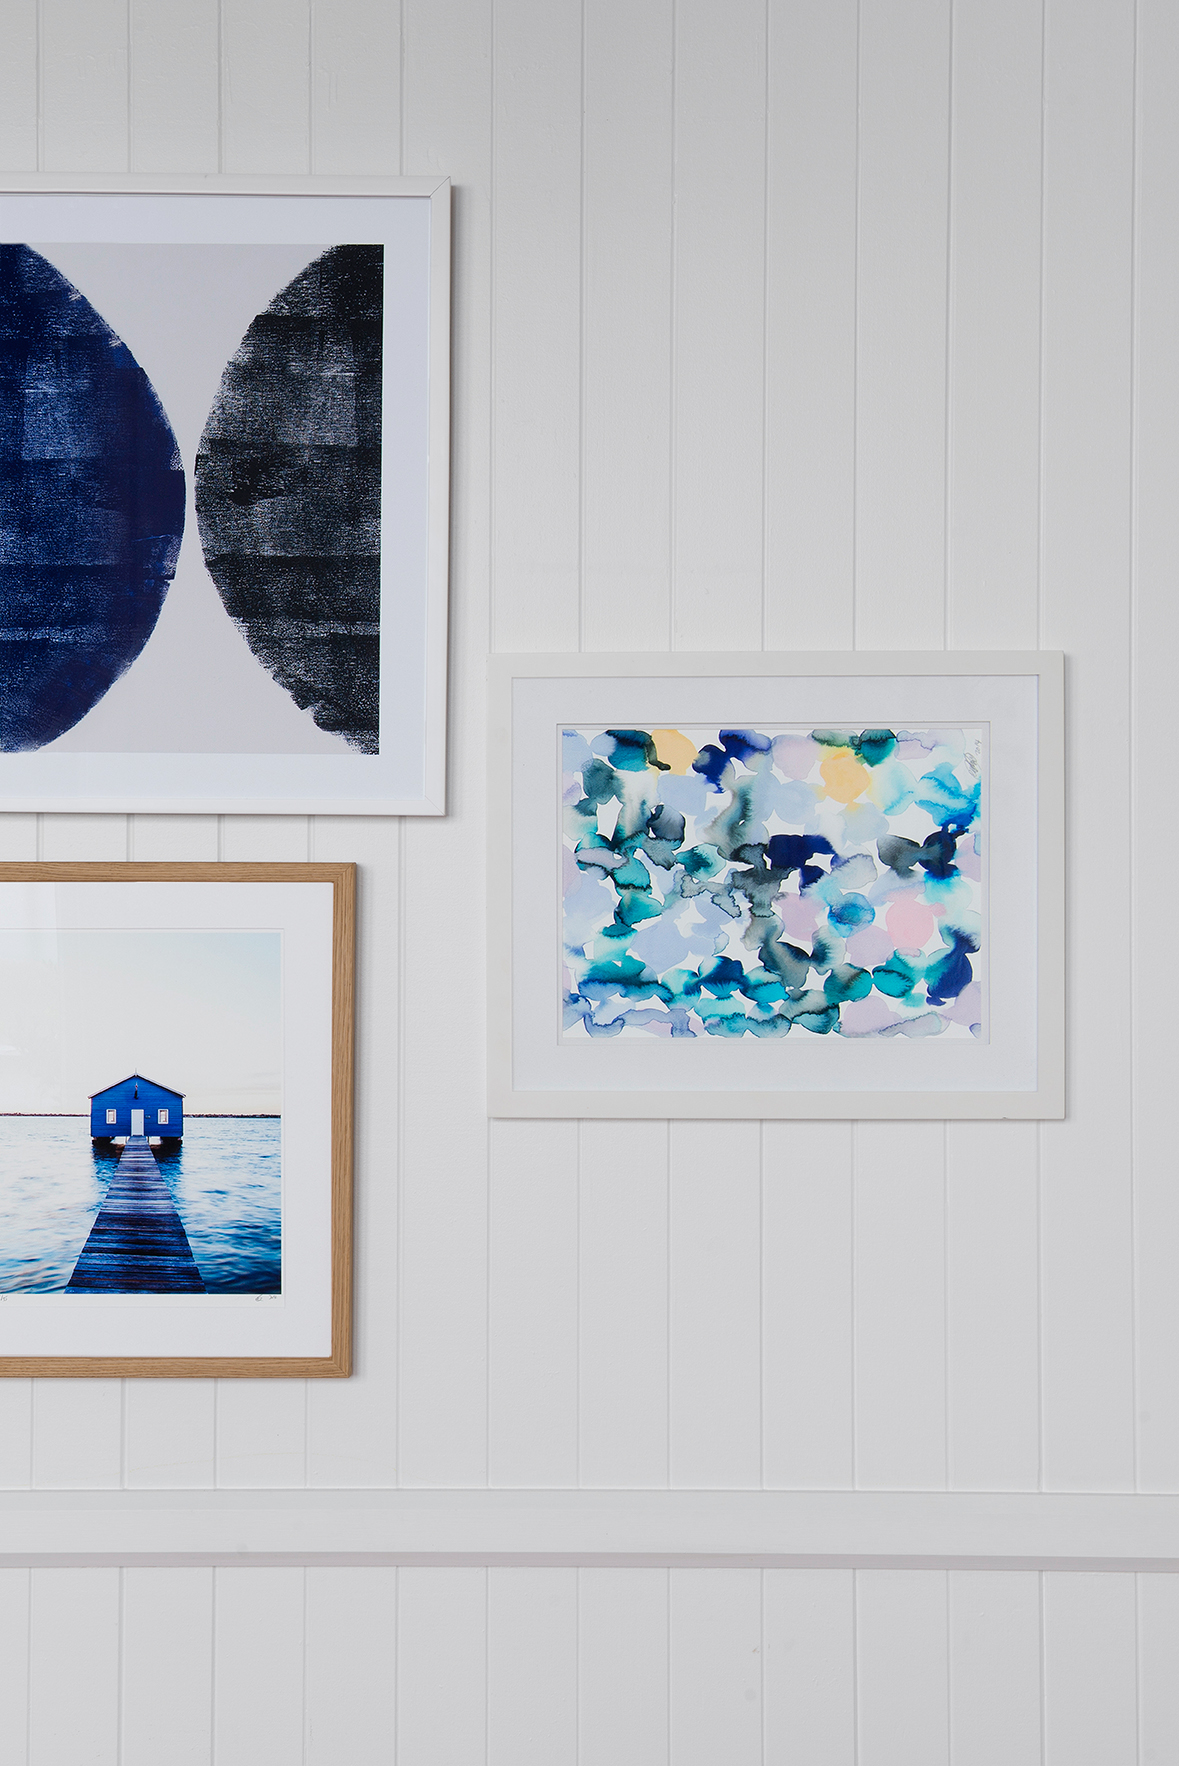
When it comes to hanging art, the general rule is to keep your piece at around eye level. When it comes to a gallery wall, however, this rule is loosened. The best way to achieve your ideal layout is to play around with your art on the floor first. Move your art pieces around until you strike the ideal combination of portrait and landscape pieces and a good balance of large, medium and small art. Hot tip: Don’t hang too many small items together, as the wall can become busy and lose impact. If you’ve achieved your ultimate layout on the floor and need some more assurance before you start hammering holes, you may consider creating a paper template by tracing your art onto paper, cutting out the shapes and sticking them to the wall.
- How to measure
Once you’ve worked out where you want your pieces to hang, measure from the top of the art to the ceiling. From here, holding the string at the back of the frame, suspend the artwork by your finger and measure from the highest part of the string to the top of the frame. Add the two measurements together and with your total, measure that distance from the ceiling to mark the spot on the wall on which your picture hanger will be positioned.
- Choosing your artwork
Ideally, you want to utilise artwork that you already have in your home, although you may need to purchase a couple of additions to complement what you have. Think laterally and get creative. I’ve been known to frame beautiful pieces of printed fabric that would otherwise be tucked away in a drawer. There are no hard and fast rules when it comes to the type of art that you place together. Finding visual balance will come by moving your pieces around until you have a good even scattering of colour across the wall. Simply, opt for pieces that make you happy.
- Framing your art
How you frame your art is subject to the look you are trying to achieve. For an eclectic look, mix up your frames in terms of colour, size and style. Ornate frames can look really cool and quirky when paired with a more contemporary counterpart. In general, I like to keep to a fine square profile frame, usually favouring timber or black for a sophisticated look. The size of the mat with which you choose to frame your piece of art is subject to how large you want the art to appear. But I always keep to a plain white matt, with no other borders, to allow my art to do the talking. There are also plenty of retailers who offer a range of ready-made frames if you’re looking to save some money.
- Hanging your art
For the most part, metal picture hangers (sold in packs at the supermarket and hardware store) are all you need for hanging your art on a plasterboard wall. For large and heavy pieces use two picture hangers and for heavier items again, you’ll need to use wall mates. On a wall constructed of brick or block, the density of the wall means you’ll need a drill. Drill your hole, insert a wall plug, and finally, insert a screw into the plug on which your art will hang.
Products: 1. ‘Ish’ Artwork by Amber Kingi $650, Trader Trove; 2. Boat Shed print (print only) $290, Kara Rosenlund; Framing – Artisan Picture Framing $75; 3. Baeck wall art $99.95, Sheridan Design Studio; 4. Large white canvas: Artist, Jan Van Dyke, my own; 5. Watercolour canvas: Artist, David Hinchcliffe, my own 6. Small framed print: Artist, Emily Green, my own.
Images by Mindi Cooke.